
How to create Web Application for Web Application Scan in Qualys?
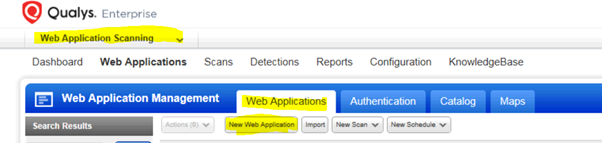
- Login to Qualys Portal and select Web Application Scanning on the right-hand side dropdown. Then Click on Web Applications and then again click on Web Applications. Finally, click on New Web Application – as highlighted in yellow in the below picture
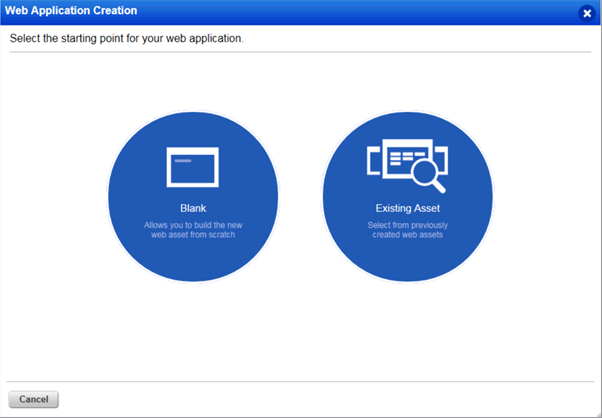
- Select Blank if you are setting it up for the first time. If you have an asset created already then select Existing Asset
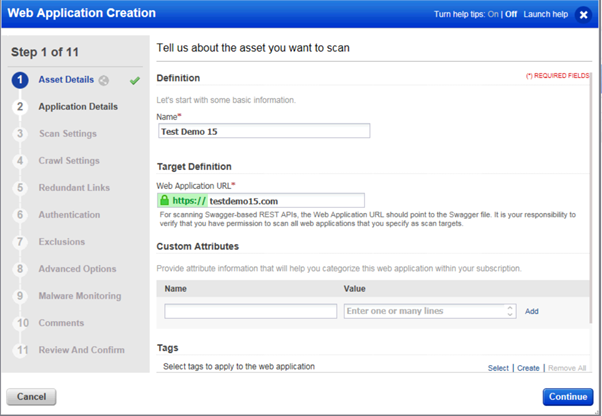
- Enter the desired name – I have used Test Demo 15 as a Web Application Name. Also, click on http:// so that it changes to https:// and enter the application URL – I have used testdemo15.com. Finally, click on Continue
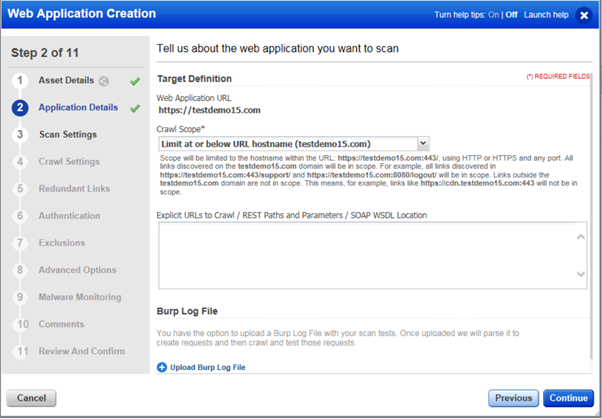
- Choose the desired Application Details and then click on Continue. Sample screenshots below
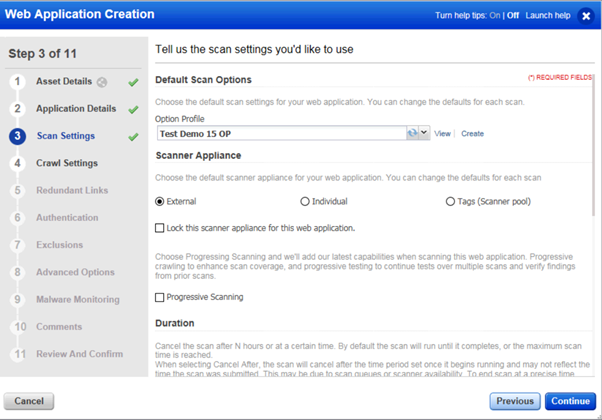
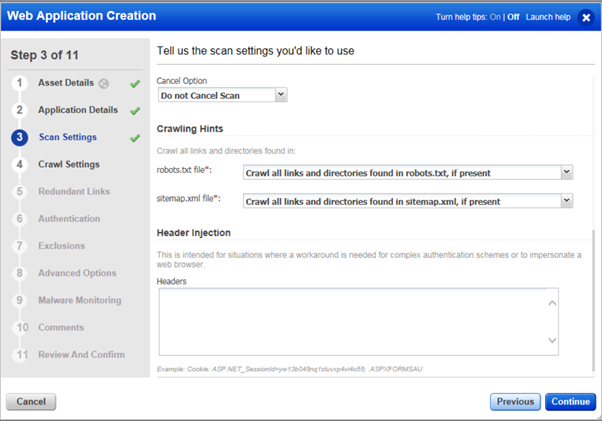
- Choose the desired Option Profile if you have already created enter the name. In my previous post, I have detailed steps on how to create a New Option Profile. Sample screenshot below
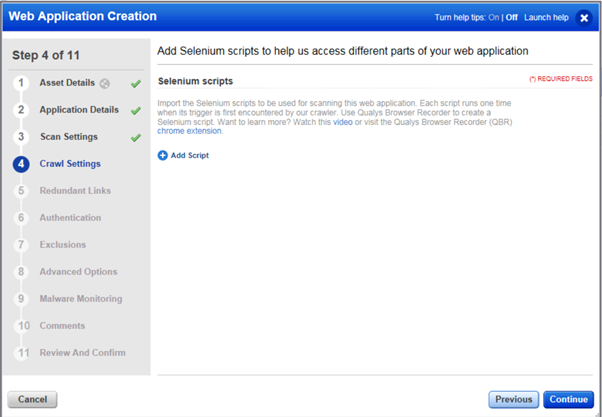
- Choose the desired selenium script, if any
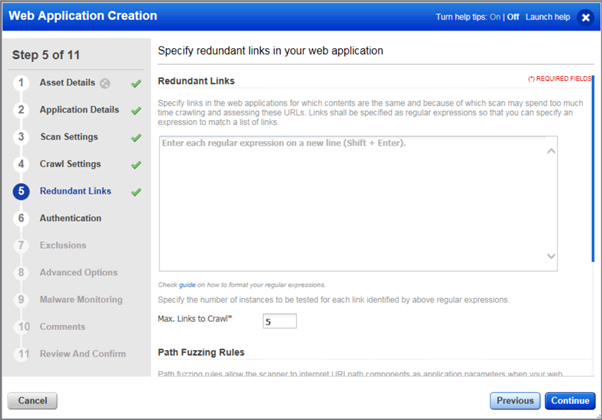
- Choose the desired Redundant Links, if any
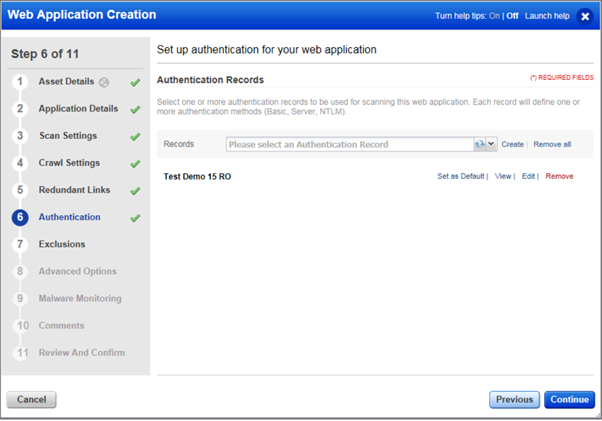
- Choose an already created Authentication Records or create one now. In my previous post, I have detailed steps on how to create New Authentication Record
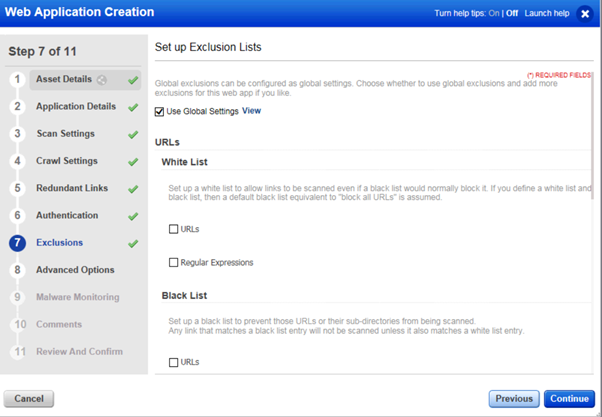
- Choose desired Exclusions configuration
- Choose the desired Advanced Options

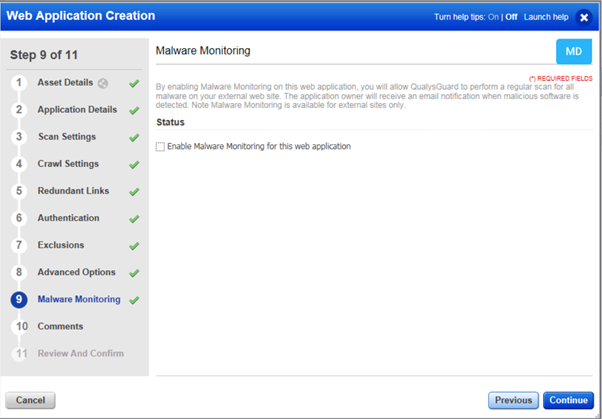
- Choose the desired Malware Monitoring
- Enter any comments

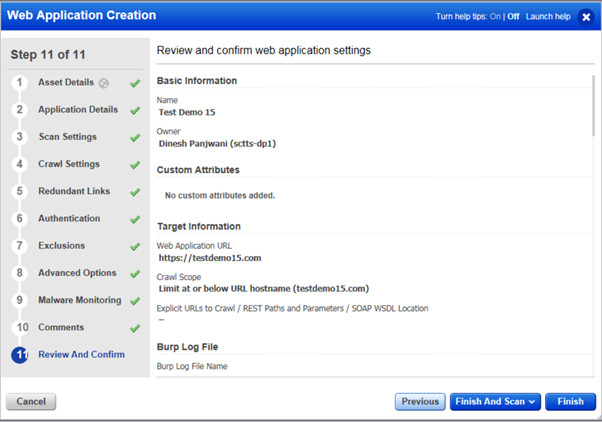
- Review the configuration and if any changes required, then click on Previous. Finally, click on Finish

The is really helpful
LikeLike
As I am IT student it was very much helpful for me thanks a lot
LikeLike
I found this really helpful.
LikeLike
Best information
LikeLike
Step by step explanation. Easy to grasp
LikeLiked by 1 person
Informative and useful too
LikeLike
Very helpful post. Please keep sharing such useful articles.
LikeLiked by 1 person
Very helpful article 👍
LikeLike
Your post is nicely explained and it’s easy to understand !!!
LikeLiked by 1 person
Explained very clearly in step form…helpful…!!
LikeLike
Nicely explained
LikeLike
Well explained…
LikeLike
Thanks!!
LikeLike
Detailed information helped me a lot
LikeLike
Worth reading..
LikeLike
Very nicely written
LikeLike
Well explained
LikeLike
Very well explained
LikeLike
Hi,
Very Nice blog. Good to start for creating a single web application.
We can even try via different methods
1) Import a web application in a CSV file – Go to Web Applications and select the Import option above the list. Follow the instructions to create your CSV file, and tell us where the file is located. Be sure to click the Import button.
2) Select web applications from your catalog – Your catalog shows you web applications found in your vulnerability scans and maps (from the VM application). Go to Web Applications > Catalog to select web applications that you want to add to your subscription.
3) Save and edit a copy of an existing web application – Go to Web Applications, select a web application and choose Save As from the menu (or edit the web application and click Save As in the wizard). Give the new web application a name and then edit the settings as you wish.
Question: Can you help me in knowing more about what are web assets? and How to give Permission to web assets???
LikeLike
Very helpful post, thank you
LikeLike
Nicely explained
LikeLike
Very helpful, thank you
LikeLike
Nicely explained ,great work
This makes ur work so easy
LikeLike
Promising content!!
LikeLike
Thank you for posting this! Perfect 🙂
LikeLiked by 1 person
Keep posting. Thanks!
LikeLike
Perfect! This is exactly what I was looking for.
LikeLike
Wow great explanation for WAS.
LikeLike
Wow fabulous content!
LikeLike
WAS concepts are clear!
LikeLike
Nice concept!
LikeLike
Great work!
LikeLike
Helpful article
LikeLike